 Copyright © Michael Richmond.
This work is licensed under a Creative Commons License.
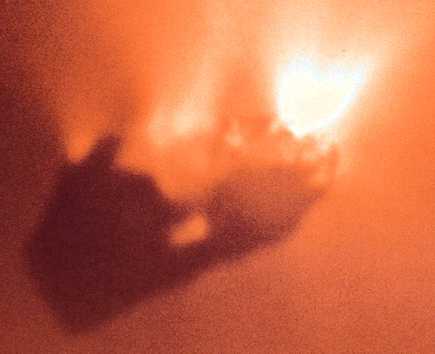
Locating objects in the solar system -- planets, asteroids, comets -- can be tricky. Although we can predict the motions of the major planets and asteroids accurately, orbits of the smaller bodies may change significantly over a small number of years: they may be perturbed by the gravitational forces of other bodies, or additional observations may improve their orbital elements. Comets are subject to large non-gravitational forces as surface material sublimates and shoots off their surfaces, sometimes in jets:

Moreover, new asteroids and comets are being discovered all the time; any planetarium program will have an old list which doesn't contain the latest discoveries.
I recommend using the JPL Solar System Dynamics web site as a good starting point for all things in the solar system. The tool I use the most is
When you connect to the site, you'll see a page with a list of settings.
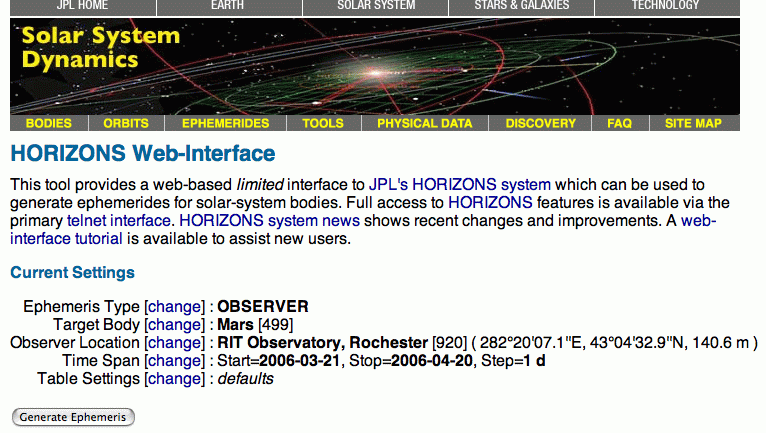
You should click on each one in turn to prepare to generate a list of positions for the object of interest.
If you scroll down a bit, you'll see another bunch of options. I usually select
At this point, I submit the form. The JPL site returns an "ephemeris", which is simply a list of positions (and other properties) at a set of times. For example,
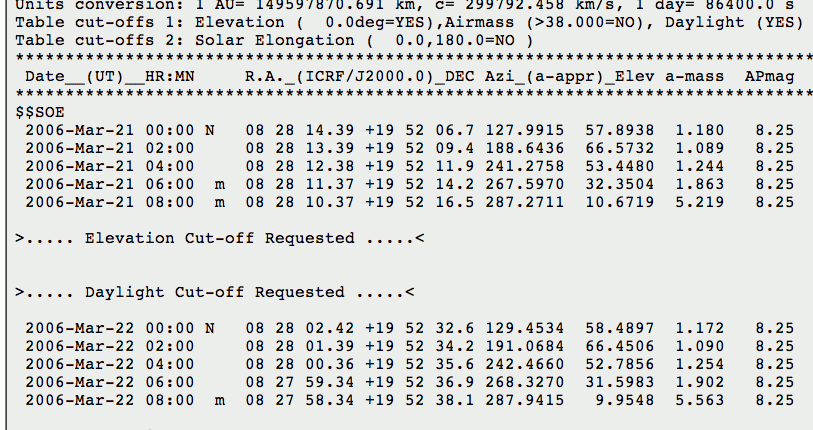
The default output runs across many columns; the important quantities are
Once you have a list of dates, times and positions, you can use a planetarium program to figure out where to look ... or you can use one of the several on-line tools to make finding charts.
There are two big players in the on-line astronomical database game:
      http://simbad.u-strasbg.fr/simbad/   (true home site in France)
      http://simbad.harvard.edu/simbad/    (US mirror at Harvard)
http://nedwww.ipac.caltech.edu/
They both are great resources, with slightly different points of view: SIMBAD concentrates on stellar data, whereas NED specializes in information on extragalactic objects. There is quite a bit of overlap between their databases and their capabilities. I'll discuss SIMBAD here, since we can't do much extragalactic work at RIT.
If you just want some information on a star, you can go to the SIMBAD home page and enter a query by identifier or coordinates. For example, a search on 61 Cygni returns a page with a bunch of basic information:
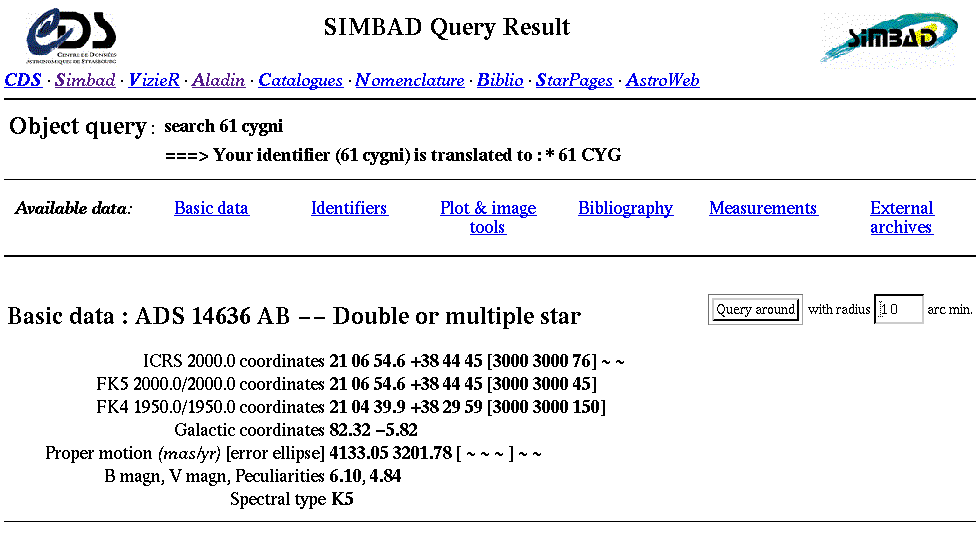
If that's not enough, further down on the returned page are
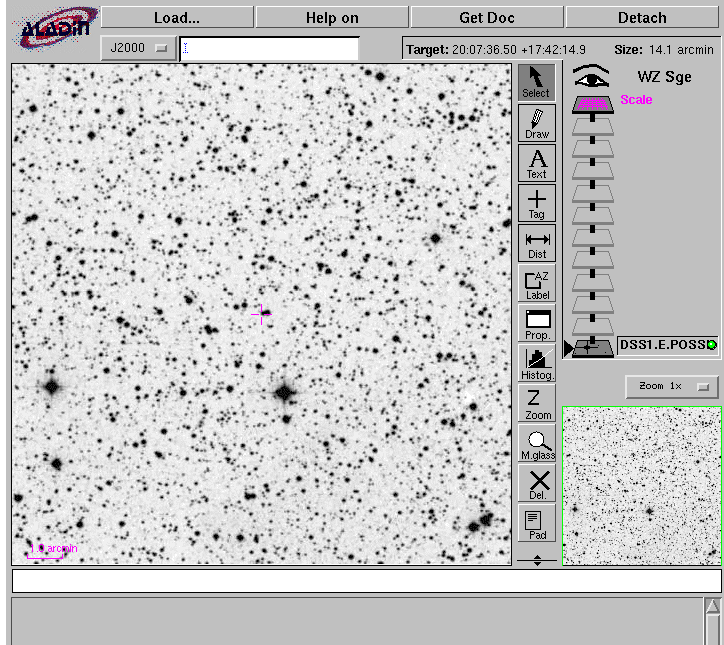
If you want to make a finding chart for an object, I recommend the
http://aladin.u-strasbg.fr/java/nph-aladin.pl
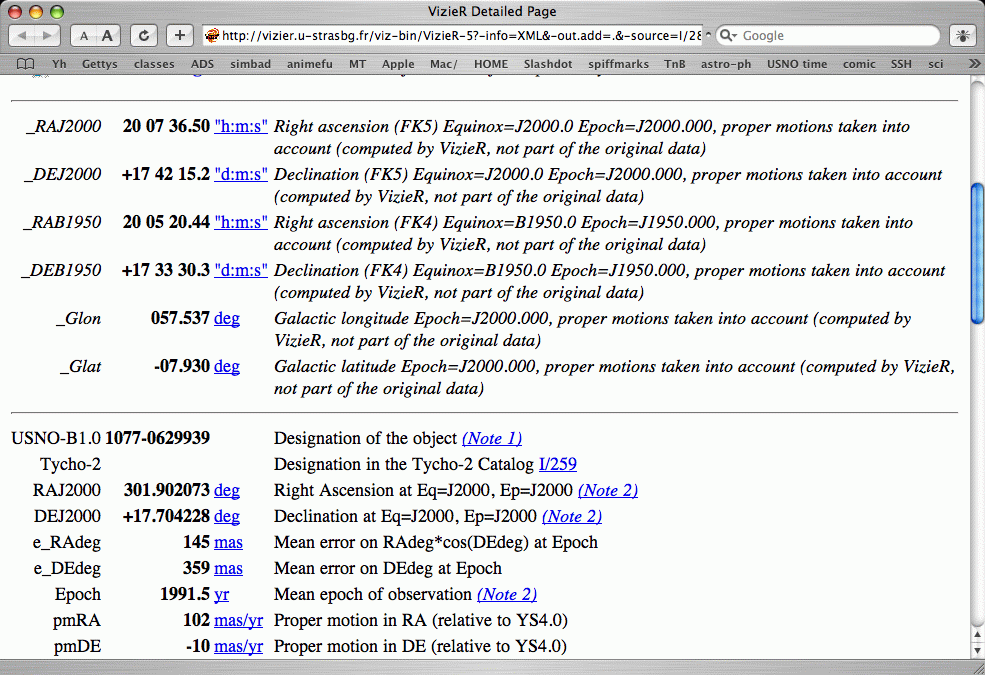
It will create charts which are well-matched to the scale of the RIT Observatory's CCD camera, and provide a wealth of additional information. For example, let's consider the star WZ Sge, an interacting binary which very rarely increases in brightness by over a factor of 100.

(several boring ones)
Exercises:
- Look up the position of Pluto as seen from RIT Observatory on the night of Jul 4, 2010 UT. Be sure to request position each hour.
- What is the magnitude listed for Pluto on this date? Look for the "APmag" column in the ephemeris.
- Make a finding chart for your object. (I suggest using the SERC SR-DSS2" image from Aladin) Mark by hand the position of the object at 9:00 PM, 11:00 PM, and 1:00 AM local time.
- Find two stars in the field which have approximately the same magnitude as your object. Use the "USNO-B1.0" survey. Mark them by hand on your chart.
- The RIT 12-inch telescope and CCD camera (without focal reducer) yield a field of view about 16 by 12 arcminutes. How does your chart compare to this field?
- Compare your chart to the image of Pluto taken on that night (shown below). Can you figure out the orientation of the image? (If you click on the Image -> Symmetry menu item of the Aladin window, you'll be able to flip/flop the chart top-for-bottom and left-for-right. Try it). Can you find Pluto? Perhaps it might help to blink.
- Pick one of the following objects.
- Pluto
- NGC 205
- V407 Cygni
- Euterpe
- The Ring Nebula
- Albireo
- NGC 6205
- an object of your choice, subject to instructor's approval
Do the following for this object.
- If it is a member of the solar system, use JPL Horizons Web Interface to figure out where it will be on this coming April 15 at 10 PM and midnight local time.
- If not a solar system object, use SIMBAD to look up basic information.
- Make a finding chart for the object using Aladin.
- Measure a rough size for the object. Express the size in both arcminutes and degrees.
- Determine roughly the magnitude of your object.
 Copyright © Michael Richmond.
This work is licensed under a Creative Commons License.